01 09 10

Sunday, June 26, 2016

SITTING HERE - PORCH SWING CARD

Here is another card we did in the last class.  A different use for the porch swing!


Stamp sets

Sitting Here
Sheltering Tree
Petite Petals & punch

5 1/2 x 8 1/2" Soft Sky cs--score at 4 1/4" & fold in half.
4 x 5 1/4" Dapper Denim cs--stamp your flowers with Dapper Denim ink & punch them out.  Just be careful not to be right next to the edge of the card stock.  See the picture below.
3 3/4 x 5" very vanilla cs--Stamp your porch swing using Crumb Cake ink.  If you look at the picture below you will see that I was making the card the other direction.  Either way will work!  Notice that the porch swing did not stamp perfect & that is okay.  The flowers will cover up this.

After you stamp the swing or fence--stamp the tree trunk.  
Wild Wasabi ink for the leaves
Real Red for the bird

Put your layers together & add the flowers.  I used the Wink of Stella pen for a little glitz or shine in the flower centers!


I hope you liked this card.  If you need any of the supplies just click on the link on the left for my website.

Happy Stampin

Cindy
Monday, June 20, 2016

ENVELOPE PUNCH BOARD CARD


Here is another card from class.  This would be a great "man" card!

4 1/4 x 11 Emerald Envy cs (new in-color)  Score in half at 5 1/2" & fold---Put the folded edge at the 4" mark on the envelope punch board & punch.  This will be a little hard, but will go thru both layers.  Then flip the card over & keep the folded edge at the 4" line & punch again.

4 x 5 1/8" white cs---Line up at the 4" mark & punch both sides.  Remember to flip the card stock over to get the second punch!

In the Meadow stamp set

Deer stamped in Soft Suede
Wild flowers stamped in Soft Suede
Wild flowers stamped a second time with the Emerald Envy ink.  Just off set it a little to give a shadowed look.  Mine were pretty close.  I was actually trying to have them a little farther off!  It will all look good!
Grass in stamped with the Emerald Envy.

For the sun I punched a 1 1/4" circle out of scrap cs.  I held it down & sponged around it with Daffodil Delight ink.

Attach the white  to your card base.  Wrap Linen Tread around it twice & tie in a knot

Hope you liked it!
Happy Stampin!

Cindy

Friday, June 17, 2016

BUTTERFLY CARD


This is one of the cards we made in class this month.  I just realized that I didn't have the greeting stamped when I took the picture.  I guess I will have to take another picture!  I will go on with the directions & post the picture with the greeting later!

5 1/2 x 8 1/2 Sweet Sugarplum cs--score at 4 1/4 & fold in half (this is a new in-color)
4 x 5 1/4 Sahara Sand cs
3 3/4 x 5 white cs


The stamp set is Timeless Textures 
I used the Sahara Sand ink & stamped using the one that looks like a grid


Then I stamped right over the grid with the next stamp.
Add a couple of the swirls.

Now you will use the Sweet Sugarplum ink to stamp the flower like stamp & then I added some of the little dots for filler.

The butterfly was cut using the Bold Butterfly Framelits & a scrap of the Sweet Sugarplum cs.  Attach the butterfly with a glue dot & I used 3 small pearls on the butterfly's body.

The greeting I used was from an old stamp set that I had & stamped with  Sweet Sugarplum ink.

I really liked how this card turned out.  It would be great for a wedding!


Hope you liked the card.  
Happy Stampin

Cindy


Friday, June 3, 2016

Three Step Rose card


I started with Blushing Bride cs cut at 5 1/2 x 8 1/2--Score at 4 1/4" --- Then I cut off 2 1/8"

This Designer Paper is retired(Birthday Bouquet), but any would work.
DSP is 1 7/8 x 5 1/4"--This is for the front flap 
1 x 5 1/4"--This is for the back or inside of card.

Inside white 3 x 5 1/4" This piece will lay right next to the fold line.

Front --
Brushing Bride cs--3 1/2 x 4"
White cs--3 1/4 x 3 3/4"

Stamps---
Rose Wonder stamp set--The greeting & the leaf
Picture Perfect--the rose
The inside words are just a stamp that I have & like.  It is not a Stampin'Up! stamp.

I stamped the rose first.  This is a 3 step stamp.
This is what I used.
#1stamp--Blushing Bride ink
#2 stamp--Pink Pirquette ink
#3 stamp-Watermelon Wonder

If you look you will see a little tab like on the stamps.  If you put that towards the bottom each time you stamp it will be easy to line them up!

After I stamped the rose I did the greeting in Watermelon Wonder ink.  Then I stamped the Leaves using Mossy Meadow ink.  I just tried to fill in the area with leaves.  I stamped off the stamp on scrap paper first, so that the ink would not be real dark.

Be careful when you tape or glue front on the card base.  Make sure your adhesive is on the correct part!  

Happy Stampin
Cindy

Wednesday, June 1, 2016

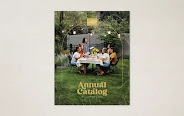
NEW CATALOG

Today is the first day you can order from the new catalog.  Be sure to check out the link on the left side.  Here is a hostess code for this month    FEFMSRJC  

I will be posting some pictures soon!

Happy Stampin
Cindy